
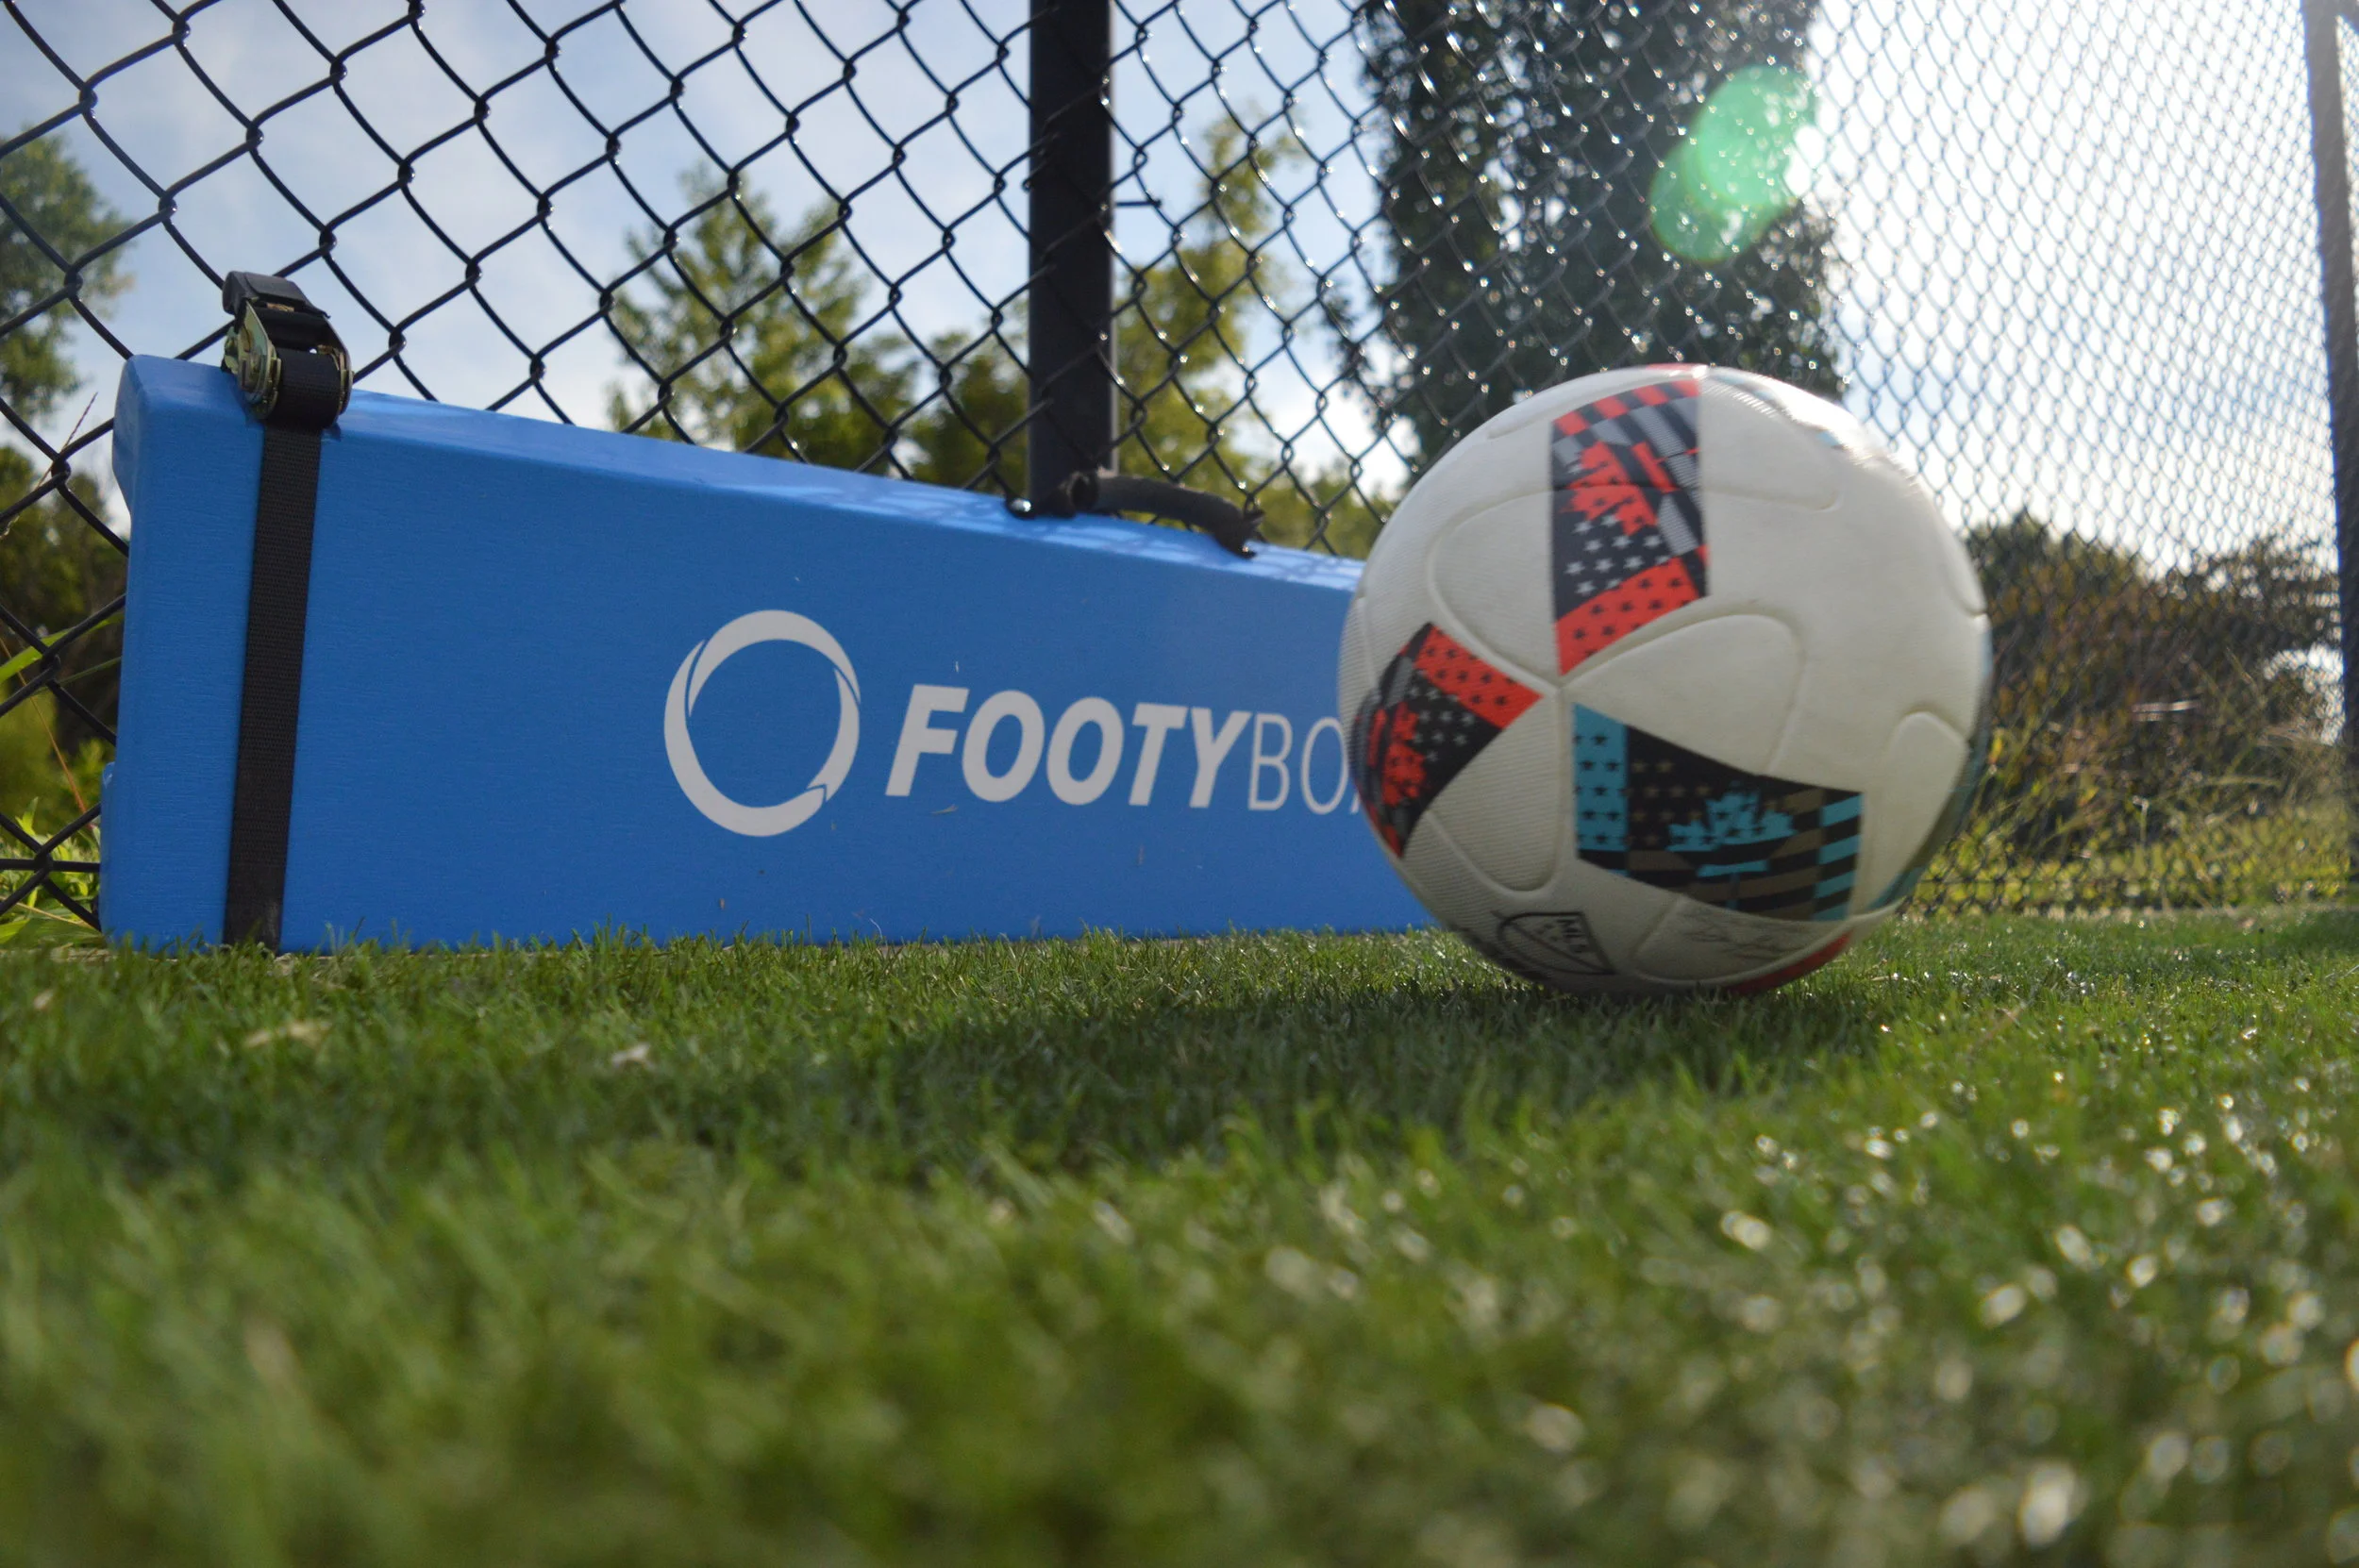
How To setup your footyboard®
Passing angle setup followed by upward angle setup
A few things you need to know:
For the best quality rebound, line the center of the FOOTYBOARD® up with the steel pole of the fence.
Thread the strap through a chain link that’s lower than the top of the FOOTYBOARD®. ***If you choose links higher up the FOOTYBOARD® will “ride up” the fence as you tighten it. By choosing links below the top of the FOOTYBOARD® you will be pulling it towards the ground as you fasten it.***
Fully open the ratchet by pushing down on the spring release tab located inside the padded handle. While the ratchet is fully open it cannot be used to tighten the strap. Once you tighten the strap you will not be able to loosen it without first using the spring release tab to open the ratchet fully.
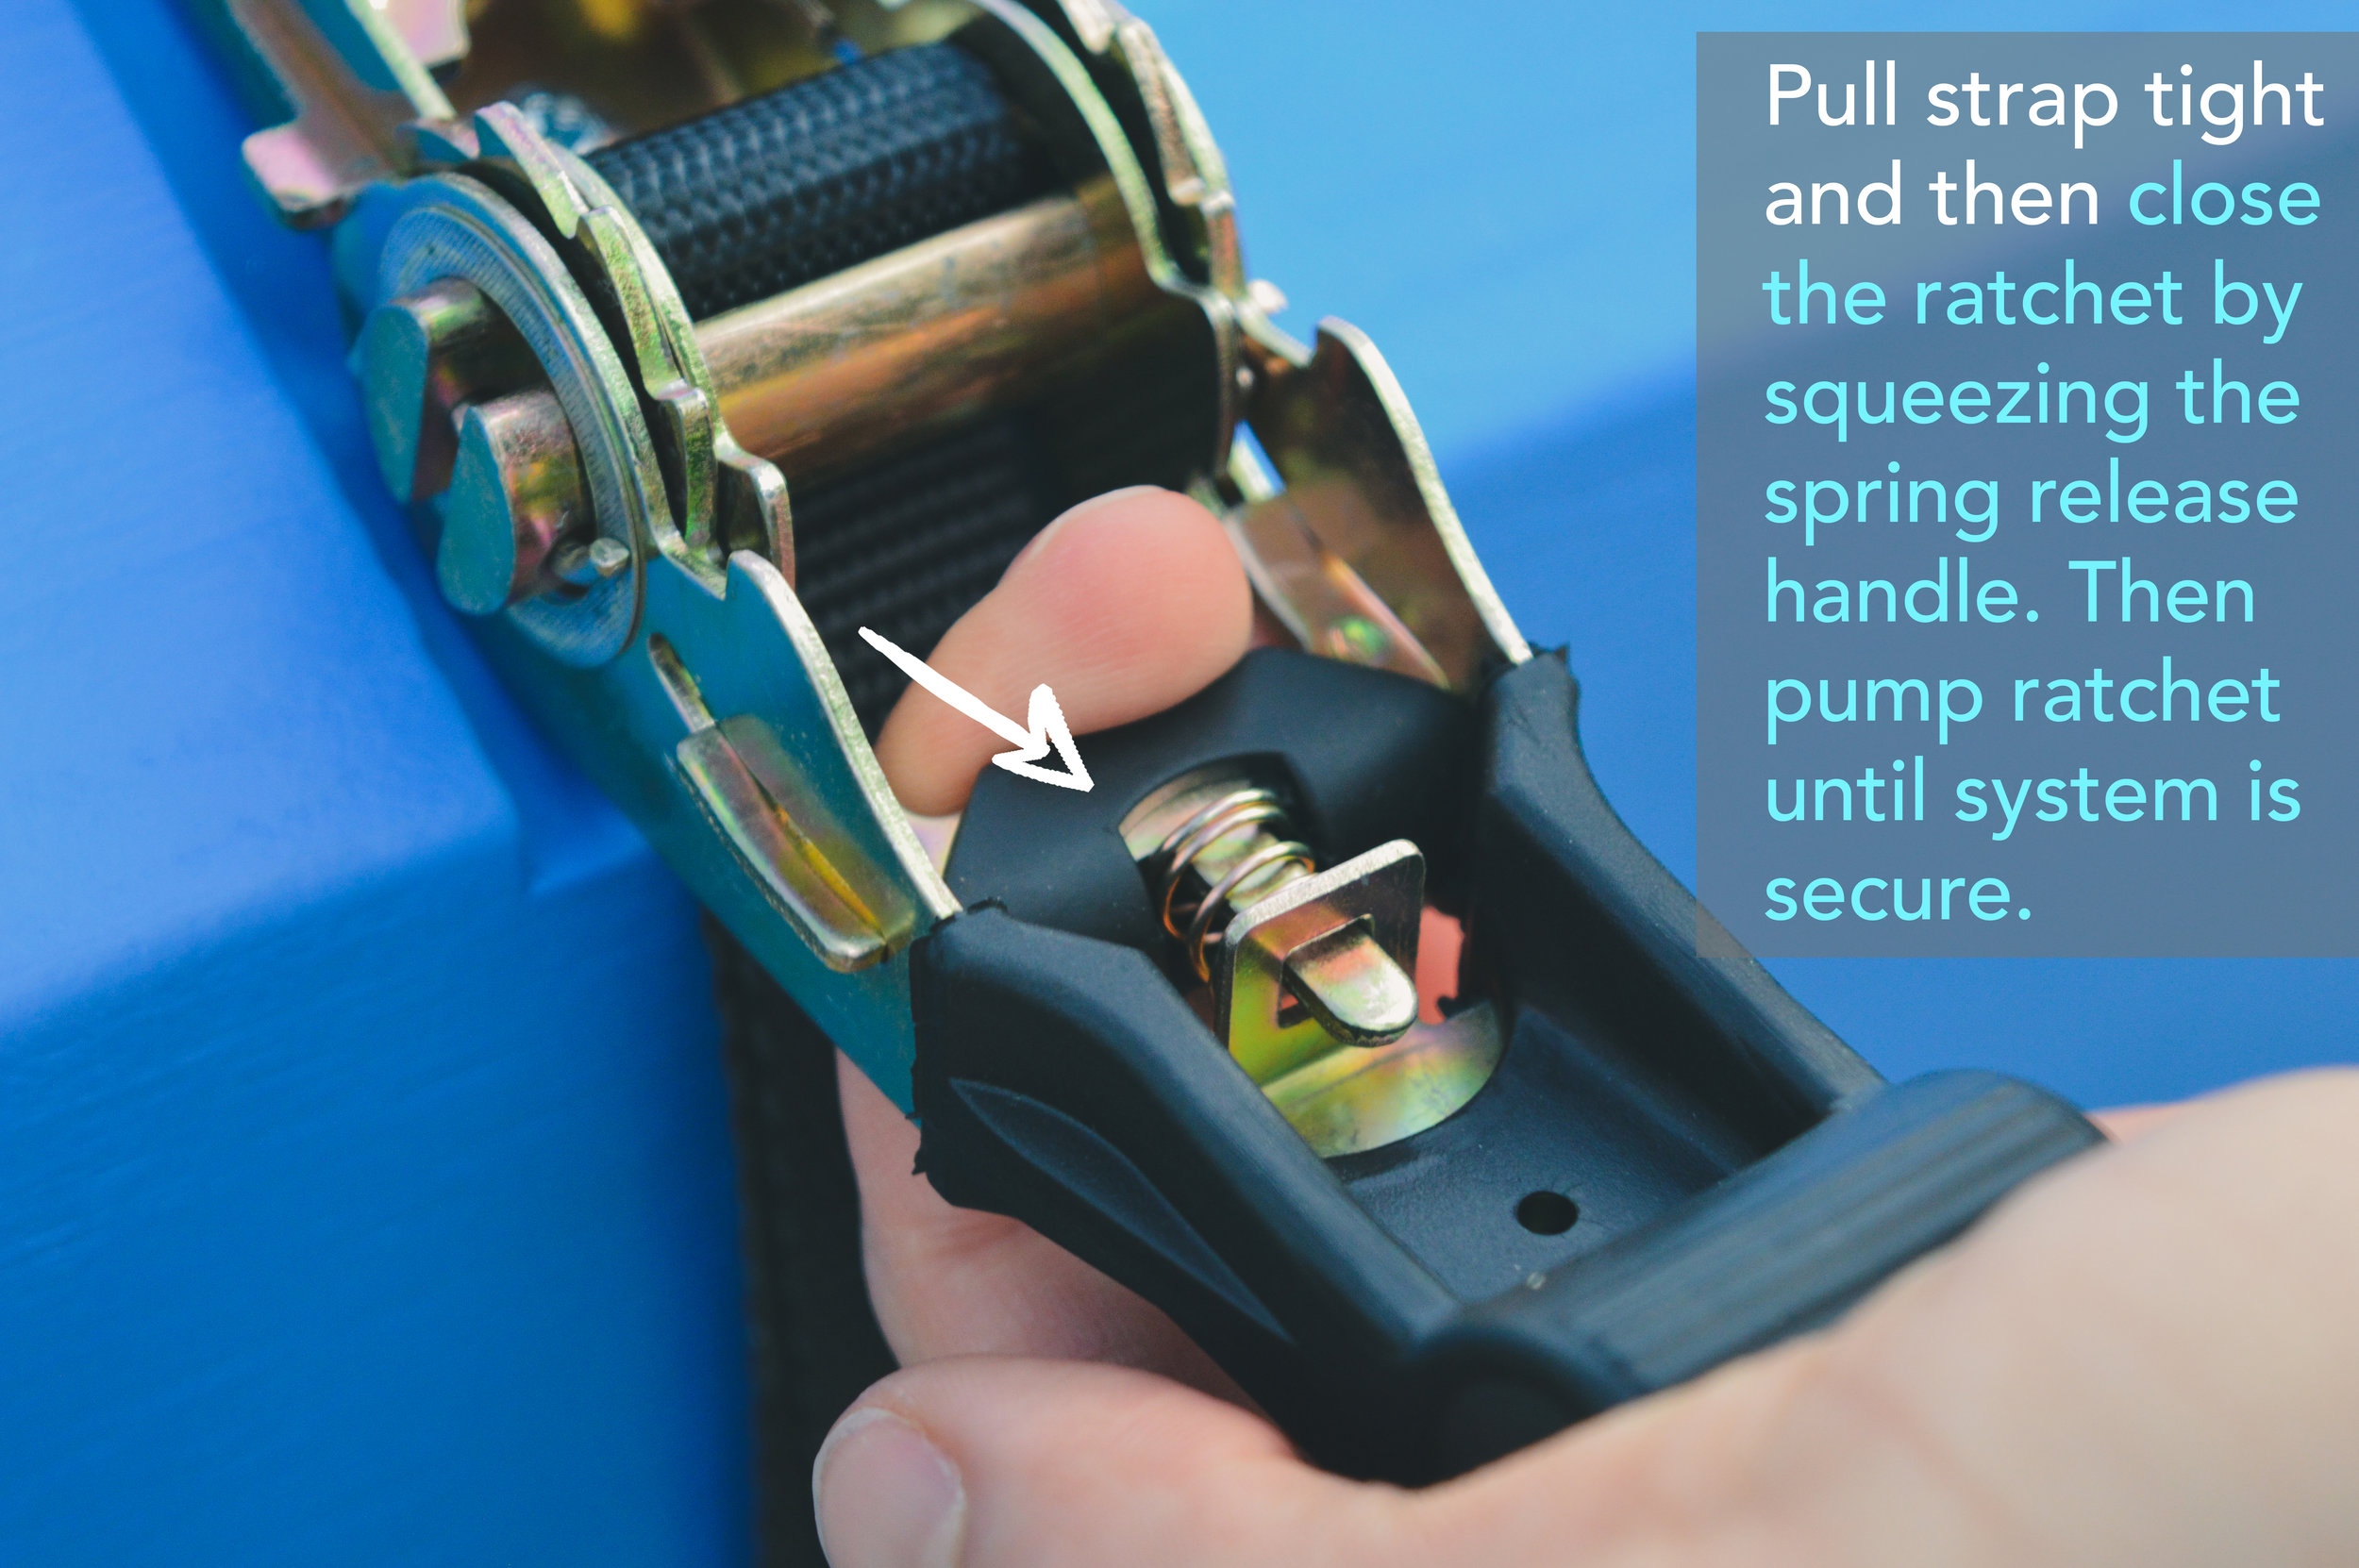
spring release TAB
Pass the strap through the chain links, grab it at the bottom, and thread it through the ratchet opening.

Threading Ratchet STRAP
The FOOTYBOARD® should rest flat against the fence for the passing angle. Partly tighten one side, then the other, and back again to avoid tightening one side more than the other side.

RE-THREADING RATCHET Strap
When you want to engage the pop-up angle, unlock the ratchet by pressing down on the spring release tab to fully opening it. Partly loosen the straps without pulling them all the way out. Pull the bottom of the FOOTYBOARD® away from the fence, allowing the angled upper beam to rest against the fence. The angled part of the bottom beam should be resting flat on the ground. Retighten the FOOTYBOARD® using the ratchets. Again, make sure the strap is threaded through links lower than the top of the board. Tighten each side gradually, being careful to keep the FOOTYBOARD® in the desired pop-up position. You should feel free to play around with different angles and train different things.